 Skip to main contentSkip to footer
If you’re an ecommerce merchant, then chances are high that your products are the center of attention on your website. But using photos that don’t do your brand or products justice can do more harm than good, so it’s essential to do it right.
Whether it’s apparel, shoes, or accessories- if consumers can’t see what they’re buying online, they’ll just move onto the next site.
In fact, poor quality product photos is the 3rd largest reason why online shoppers won’t purchase your product, so your game needs to be on point!
The problem is: the market doesn’t give you a guidebook for what kind of photos will perform best for them, but that doesn’t mean you should give up though!
There are plenty of tricks and techniques to help make sure all of your photos look great, and whether you’re an E-Commerce merchant or a new product photographer, we’ve compiled some best practices that we actually use ourselves that can apply to any type of photoshoot, so that you can wow shoppers with every photo!
Table of Contents
What Makes Good Product Photography?

Aside from the technical aspects of taking good product photos, which we’ll get into later, visual storytelling is one of the most important aspects of good product photography.
A picture says a thousand words, but what are you saying?
It’s easy to take photos in three different angles, but unless those pictures reveal important details about the product, they won’t be as effective. For example if you have a great set of photos showcasing your jewelry, but people can’t see how it looks on someone’s wrist – that would be a missed opportunity!
Good product photography has to tell an interesting story with every photo.
This is particularly important because there is a lot of noise and competition on the market place, and one of the most impactful ways to get a customer is through an image.
As artists, it’s your job to draw the viewers of your images into a scene that they can’t help but want to explore, or at least remember. The longer someone is admiring your images, the more invested they become in your product.
Every detail matters, so it’s important to remember the tiniest things when taking photos of anything from a jar of peanut butter to a tie clip.
This even applies to the typical white background product shot, and we created a video demonstrating how to use visual storytelling using some toothpicks:
In this blog post, we’re going to cover some best practices that will help you optimize your product photography for e-commerce and conversion rates.
If you would like more information on any element in our list below or have questions about how something works, don’t hesitate to ask in the comments below or reach out with an email.
Use The Right Equipment For Product Photography
This is a no-brainer, but using the right equipment will make all the difference in your photos. The best camera for shooting product photography is one that allows you to adjust ISO and aperture settings manually; DSLRs are perfect for this!
When choosing equipment, always remember that you don’t necessarily need to go with the most expensive, especially if you don’t shoot regularly enough to warrant it.
We’ve actually written a dedicated post on essential equipment for product photography, so we won’t belabor the point here.
Below are the most important things you’ll need for your photoshoot.
Camera
If you’re serious about product photography, you’ll no doubt want to invest in a professional camera at some point. But plenty of businesses make do with their smartphones and have great success.
Nowadays, cameras are more powerful than many digital cameras from a few years ago, so don’t rule out using what you already have if money’s an issue.
When choosing your camera, the main things to keep in mind are:
- Resolution
- Interchangeable lenses
- Manual mode (control ISO, Shutter, Aperture, Color balance)
- Hot-shoe mount
It’s also nice if the camera has low light capabilities, but you can wait on those until you’re shooting products regularly. Here are a few budget camera kits:
[table id=7 /]
Lenses For Product Photography
The lens that comes with your camera is usually a good bet for product photography, but not all of them are created equal.
In this industry, there are three types of lenses that work best and you’ll want to have at least the first two in your arsenal:
- A Variable Zoom Lens. These allow the most flexibility within a small studio and allow you to change your composition with ease. You’ll want to get a focal length between 18-150mm, with 50-100mm being the most used.
- A 100mm Macro Lens. These are great for getting shots of intricate details and small objects, and they can really make a product or object pop.
- A 50mm Tilt-Shift Lens. These are incredibly expensive, but if you shoot jewelry or watches, this is the kind of lens you’ll want as it allows you to correct perspective distortion and get the product within the focus plane.
If you’re on a budget, then the first two types of lenses will be all you need for the majority of your product photography needs.
Tripod
A tripod is essential for the quality of your product photography. It’s a piece of equipment that doesn’t cost much, so there’s really no excuse not to invest in one if you find yourself taking photos with any regularity.
You need to consider a couple of things when deciding on a tripod:
- What are you shooting with? If you’re using your phone, either buy a tripod made especially for phones or make sure to buy an adapter.
- What are you shooting? If you’re shooting tiny products like earrings, you’ll want to buy a small tabletop tripod rather than a full-sized one.
It’s also worth taking a look at the tripod’s weight since a lightweight tripod is prone to tipping over during outdoor shoots (due to wind) or if the camera is pointed directly down (since the camera’s weight will be off-center).
[table id=8 /]
Lights
It’s a good idea to think about how you’re planning to light your products when shooting: are you going to use natural light, regular lamps and light bulbs, or a professional photography lighting setup?
- While professional photography lighting can be on the pricey side, it also usually comes with diffusers and such that will make your job much easier.
- Many home photographers have used ordinary lighting and a sheet as a diffuser and have produce great results.
- If you’d like a simple, inexpensive option, you should check out these 250 watt strobes. They produce diffused light that won’t create harsh shadows, and you can easily move them to where you need them.
One of the most important aspects about product photography is finding a balance between lighting and exposure.
Pay attention to shadows and soften them as needed using fill lights, reflectors, or bounce boards (discussed later). You can light products with either of the lighting types described below or a combination of the two.
Be sure to soften lighting as needed using filters, gels, or a lightbox. Playing around with distance from the light can also make the effect more or less intense.
[table id=1 /]
Bounce Board or Reflector
Bounce boards and reflectors are a photographer’s best friend when it comes to softening harsh shadows or adding light into an area.
They can be simple pieces of white foam or coated with reflective material, much like a windshield heat shade. Their job is to reflect light back at a subject, resulting in a subtle lighting effect on the side that they’re on.
If you light a product from the left, for example, the right side will be in shadow. But placing a reflector or bounce board on the right side will reflect the incoming light and reflect it, reducing the shadow without lighting the right side quite as much as the left.
Planning A Shot List
Perhaps the most important step in your product photography process is the planning of it. Sure, taking candid shots with no forethought might turn out really well sometimes, but more often than not failing to plan will leave you with:
- Time wasted on set
- More stress
- Likelihood of reshoots
- Inferior photos
One of the best ways to avoid this is to create a shot list before you begin your photoshoot by using a mood board. Sounds scary, but it’s actually quite easy!
When planning for your photoshoot, take a minute to list all the shots you want to get. Effective product photos will include some or all of the following:
- Wide shot
- Close-ups
- Shots from every angle
- Close-ups of important details or features
- White background shots
- Hero shots
- In-context (lifestyle) shots
The more organized you are in this beginning planning phase, the smoother the shoot will go, and the less likely it is that you’ll forget a vital shot and have to do a reshoot later.
It will also help give you an idea of what equipment you’re going to need to achieve the looks you want.
Use Mood boards To Inspire Creativity
Pinterest mood boards are a fantastic way to create a shot list for product photography.
Pinterest is an excellent source of inspiration and you can use the platform’s visual organization tools such as ‘boards’ with collections of different pins, or pin topics together on one board.
You’ll also be able to find plenty of examples from your favorite brands or industries that will help guide the creative process when it comes time to shoot your product!
Let’s start with the basics – first, create a new board on Pinterest called “product inspiration” (or anything you want). You can set it to Private so people can’t see it.
From there, just upload images from magazines or online sources that convey the type of imagery you’re looking to create.
You can pin any photos if you’re using the Pinterest Chrome Extension by right-clicking them and selecting “Pin It”.
You’re now free to organize your pins into different categories or tags – which will come in handy when it’s time for shooting! You’ll be able to find plenty of inspiration without searching too hard and you know what types of shots you want before setting up your shoot.
You’ll now have an idea of what kind of backdrops and props to get (more on that later).
Keep Your Brand in Mind
Product photography should always be tailored to your brand and the type of products you’re selling.
Are you a trendy, fast-moving fashion business? Then consider using bright colors and high contrasts in your images. If on the other hand, your product is more subdued or vintage-inspired then use softer tones for backgrounds with less contrast.
There are different styles that will work well depending on who it’s marketed towards: children mostly want brighter colors while adults prefer warmer ones; women typically like purples and greens whereas men gravitate towards blue hues.
When planning and taking product photos, you should keep two goals in mind:
- The most obvious one: showcasing your products in a way that encourages people to learn more about—and hopefully buy—them
- The less obvious one: strengthening your brand by creating or increasing brand awareness. According to Millennium Marketing Agency, there are five benefits to strengthening your brand:
- Build customer recognition
- Gain a competitive edge
- Easily introduce new products
- Increase customer loyalty
- Enhance credibility
Straight forward product photos on a plain white background are perfect for letting people know what your products look like, but if you choose to include pictures of the product in real-world situations or next to props, it’s essential to take the time to get clear on what message the photos are sending and whether your target audience will respond.
The days of using generic ad campaigns to try and reach the widest audience possible are over. The clearer you are on your target market, and the more you cater to them, the more effective your product photos will be.
These can be lifestyle shots that show the types of people who use your products, or they can simply be photos that include your brand’s color scheme or a few props that are in keeping with your brand’s style.
Best Practices For Shooting Your Product
Now that your list of shots is complete, you can make a checklist for all the equipment and subjects to include.
You may want to take notes about any special lighting or props needed; if so, be sure not to forget these when packing!
It’s also wise to lay out your shooting locations in advance-especially if they are outdoors and weather could affect them on the day of your shoot. It helps ensure that there will be no surprises during photo time (and potential reshoots).
For example: it might be advisable to scout a location before booking it for shoots, as you may need to gather special commercial permits.
Below are some best practices for the actual shooting of your product.
Keep The Whole Product In Focus
Although there are a few exceptions to this rule, in product photography the best practice is to shoot your product with an aperture that gets the entire product in focus.
In some cases this will require a technique called focus stacking where you shoot a series of images, each with different focal points. Those shots are then composited into one final image in Photoshop or another editing software program to keep everything sharp.
To ensure this rule we use an aperture that’s set between f/11-f/16 which can get most parts of your product sharply focused (and make sure you turn off auto focus).
This is why your tripod is incredibly important, and where a tilt-shift lens can replace the need for focus stacking.
The only time it would be necessary to break this guideline would be for products where texture is important or selective blurring will help emphasize detail and draw the viewers eye to what you want them to focus on.
And of course, in-context/lifestyle shots that are more about branding or conveying a mood/feeling are okay to be more creative with the sharpness of your product.
For more on this, check out our post on product photography camera settings.
Take Different Types of Shots
A common mistake is taking one full-size shot of your product, and that’s it. Instead, you will want to take multiple product shots to give viewers a complete a picture and tell a visual story, if possible.
This is true because you will want to show your product in different ways. You might take shots of the product from all angles, for example; or you might focus on specific features such as a handmade tag or an intricate detail like stitching.
This is where your 100mm Macro lens will come in handy, as it will allow you to get these important details.
There are a few shots that are especially important that we’ve outlined below:
Use A Contrasting Background/Surface
Shooting white products on a white background, or vice versa, takes a lot of skill and can be difficult. The results can be really awesome too if you’re talented and creative with your lighting.
However, as a general rule you’ll want to select your shooting surfaces and backgrounds that help make your product pop out, and you do that with contrasting colors/surfaces.
For example, if you have a smooth product, a textured surface will likely make the entire image more pleasing.
One thing you generally want to avoid is having colors for your background and surface that are too similar to your product, as it can get lost in the image if you aren’t sure what you’re doing.
Get detail/close up shots
There is a very interesting phenomena when it comes to online shopping, and that is pictures that are very close up and in high detail trigger a sense of ownership of your product from the viewer.
We like to call it the “Retail Effect” and is often seen in stores where consumers can touch, feel, or try-on the product.
A good example of this effect would be when someone is looking to buy a pair of jeans they might walk into a store and have their eye drawn to an open pair on display with all the features highlighted.
The same thing happens online because one can zoom right in for detail shots without any limits; it allows you (the photographer) to show every little detail that makes your products unique from other offerings out there.
This sort of close up shot also helps differentiate each item so customers are able to see what sets them apart from others like it. Repetition becomes less frequent which means more sales!
If your product features any mention-worthy details, make sure to include close-up shots of them. This does a couple of things:
- It lets consumers know if the product has the feature that they care most about.
- It forewarns people of product features that they might not like, preventing an unhappy customer and the hassle of returns and potential bad reviews.
Common details that are worth highlighting are:
- Texture
- Zippers and snaps
- Pockets
- Lining
- Screens
Just like with any other close-up, highlighting product features like this will allow consumers to make informed decisions, so they don’t feel like they’re taking a stab in the dark with their purchase.
Scale Shots
Another essential thing to consider is that if your product is on a plain background by itself, it can be challenging for a person shopping online to judge how big or small it is.
While it’s often recommended that your main product photo is on a plain background with nothing else in the shot, it’s helpful to also include photos of the product next to an everyday item to give an idea of its size.
Smaller items like jewelry are often placed next to coins, while larger items might be set next to a piece of furniture. Be sure to choose items that match the brand, so the pictures flow.
Show Color Options
It’s easy to want to cut corners and shoot only one of something to save time and money, but if an item comes in multiple colors, patterns, or styles, it’s a good idea to shoot all variations.
Logically, people know that the product will look the same, only a different color, of course. But most online shoppers prefer to actually see the color or pattern they’re interested in, so including each style option instead of just one will often increase sales.
Plus, people are visual creatures, and potential customers need to be able to see each option anyway.
If budgets are tight, you can create color variations with your editing software.
Show People Using the Product
Product photography does more than show people what a product looks like; good photos will also make people imagine themselves using the product.
How can you do this? By shooting pictures of someone using it, of course. When you take high-quality photos of your product being used by someone, it helps shoppers feel more comfortable and confident using that item or tool.
Ideally, choose models that are in keeping with your brand, and look similar to your target audience.
In the case of clothing and jewelry, photographing the product being worn is an ideal way of showing scale, as well.
Avoid Redundant Photos
If you’re using a lot of photos for each product, please make sure to avoid redundant photos.
Having very similar product photos can confuse your customers and detract from what could have been an excellent visual experience! Not only do redundant photos add nothing, but they can also bore viewers.
This is where your shot list comes in handy, because it will help you avoid images that are too similar.
If you have two shots that are very similar, select the best one and discard the other.
Use Props Sparingly
Props are an essential part of many product photography sessions, whether they’re just in the background or interacting with the product somehow. Props can:
- Show the size and scale of your product in a person’s home
- Give consumers an easy way to envision themselves living with your products in their space
- Reinforce branding by showcasing your logo prominently on props for a cohesive look
- Set a mood/tone you want your customers to feel
If you’re sticking to product shots with a plain white background, you’ll probably be able to forgo the props. But in most cases the simple catalog shot isn’t going to be convincing enough.
That’s where in-context/lifestyle shots with props comes in.
However, you can easily go overboard with “over-propping” your scenes and end up creating visual chaos and confusing your potential customers.
For that reason, it’s best to use props sparingly.
Too many objects can only serve as distractions from what should be the focus of the image (your product), so the props that you select should be directly related to the scene or brand.
For more information on propping, check out our free blog post on product photography props.
Never Light Your Product From The Front
Even though many cameras have flashes that mount on top of your camera, it’s almost always a bad idea to light your subjects from the front. It produces a very amateur look and feels very staged.
Lighting your product from the front will also eliminate texture by reducing all shadows since the light is coming from the same angle as the camera.
In product photography, one of the best practices is to have shadows either come toward the viewer or at an angle to the product so that the image has more dimension.
This is accomplished by lighting the product from a 45 degree angle (or more) and then having another light come at an opposing angle to create shadows where you want them.
Avoid Even/Flat Lighting
Flat lighting is awful for any kind of photography. And in product photography, lighting your product evenly on both sides will make your product awfully uninteresting.
It will make your product look dull or flat by reducing its detail like wrinkles on clothing fabric or the texture of wood grain. It also reduces the perception of shape created by any shadows.
The best way to light your product is from the side. This creates form and interest, without overly highlighting any flaws in texture or imperfections in shape.
Lighting a product from one angle will also create depth by showing shadows on either side of your subject.
This means that you can capture an entire object with just two lights instead of four! Which helps save time and money for those who are just starting out learning how to take good photos at home.
Use Gradients of Light Generously
Whether they are highlight gradients on your product or lighting gradients for the background, gradients are a great way to add depth and interest.
This is also where your lighting comes in to play, and you’ll be using a softbox most of the time.
If your product is not shiny, you might want to consider using a reflector, which bounces light onto the product.
Use the Best Product Sample to Shoot
Dust, scratches, scuffs, crooked labels, etc. are all nightmares to edit.
This one will sound obvious, but it’s not uncommon for inexperienced businesses to use floor models in their product photography instead of a new, unopened model.
Remember that when products are being professionally shot, every mark and imperfection will show up and you will need to edit them out. So unless you like being frustrated, don’t even use a product that’s been used or is scratched or damaged in any way.
When shooting product photos, make sure to always use a brand new item, still in the box, if possible. The better condition the product is in, the better.
This even goes for products being shot in lifestyle settings—you always want to make the product look flawless.
One thing we always use in our studio is white cotton gloves so that we don’t leave any smudges or fingerprints on the product and can keep it in pristine condition.
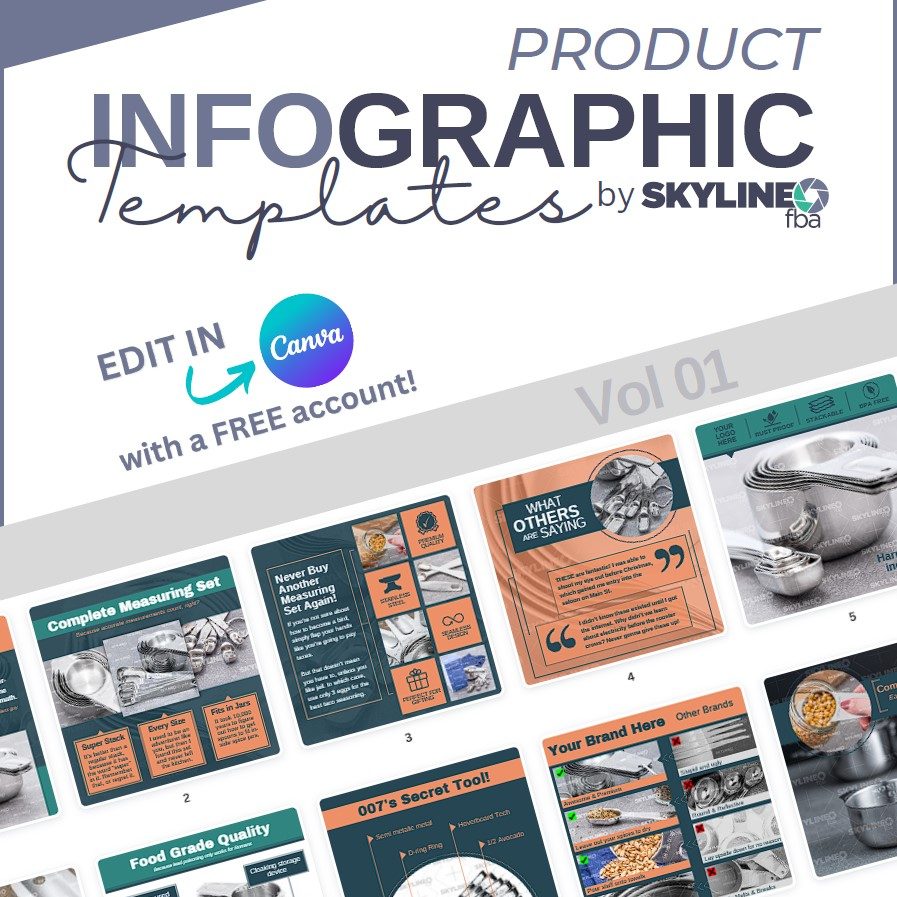
Shoot to Specifications For Infographics
We’ve all seen it happen – a beautiful image that turns into an ugly infographic.
Infographics are great for sharing data in visually engaging formats, but they must adhere to certain specifications.
When creating infographics, make sure you take your product photos in ways that allow the information to naturally flow throughout the infographic. Check out our Product Infographic Templates to see examples, and you can also purchase them to use in your own projects as well.
Otherwise you’ll want to know what your infographics are going to look like before shooting your product. For example, you’ll want to leave room for Titles and Descriptions, or even Data and Labels.
Start by sketching out the layout of your infographic to make sure that you have enough room for all necessary information. Sketch what you want on each page, then take a photo with an iPad or other tablet in landscape mode.
This will be helpful when figuring out where not to shoot – focus on anything unnecessary so you can compose your shot to make it look like it was specifically made for the infographic, because it was.
Shoot Tethered
They say the devil is in the details, and when it comes to product photography, the devil is your small display screen on the camera.
It’s important to have your camera tethered to a monitor so that you know what kind of quality you’re getting, as you’ll be surprised by all the little details that can get missed. For example: if you’re shooting a watch, the strap might be slightly out of focus, but if you see it on the monitor before taking the shot then you can adjust accordingly.
It will also give more peace of mind when editing because it’s much easier to review your images in detail and make adjustments before you get to the edit bay.
This will save you lots of time and frustration.
Master Retouching
A common mistake that amateur photographers make is to get sloppy during shooting, assuming that they’ll be able to fix anything that goes wrong later during editing.
Generally speaking, editing is not meant for completely changing the look of an image, but rather for meant for minor corrections like:
- Cropping
- Adjusting the white balance
- Adjusting color and contrast
- Removing dust and scratches
While it’s true that you can completely change the look of a product, the best practice for product photography is to shoot with your edits in mind, whether they are composites or adding graphical elements.
Having to completely edit out mistakes that could have been avoided before shooting wastes a lot of time.
To make things easier for yourself in the editing room, take the best photos that you possibly can, to begin with. Otherwise, you’re setting yourself up for, if not failure, much more time and stress than is needed. This is especially true if you’re still learning your way around your editing software.
It also helps to take the time to learn everything you can about editing by:
- Taking classes or watching tutorials
- Practicing (a lot) before a real product shoot
- Becoming part of a community, in-person or through online forums
Mastering your editing software in addition to following photography best practices will guarantee that you’ll end up with product photos you can be proud of.
Always Create A “Knock-out”
I can’t tell you how many times I was happy that I took the time to use the Pen tool to create a knock-out of a product from the background, which has allowed me to make quick variations of an image or fix a problem.
I recommend that all photographers make a knock-out of the product from any background they are using.
This allows you to do so many things with the image, including:
- Easily removing a background and replacing it with something more interesting
- Lightening or darkening just one part of the image without affecting other areas.
- Quickly make fixes to your subject without affecting the background, or making changes to the background without affecting your image.
Although it’s tempting to create knock-outs with channel masks or the quick selection tool, it often doesn’t produce clean results and you end up with jaggy edges.
Take the time to use the Pen tool, and do it right the first time.
Optimize Photos For Each Platform
We’ve all been there—excited to see a product we want to learn more about, or even read an article that looked interesting, but when we click onto the page, it takes forever to load.
The more patient among us will wait it out, but many more will leave, moving onto more fulfilling pursuits, like watching cat videos.
In general practice, the more “stuff” that a web page has on it, the longer it takes to load. That means that if you upload your photos as giant files, the page speed on your site will start to suffer.
Instead of driving more traffic (and therefore business) to your site, people will be leaving before they even have a chance to see your amazing (and still loading) pics.
To make sure that your photos aren’t too large, you can head over to Google PageSpeed Insights, which will let you know how well your page is performing. If your newly uploaded photos have affected the page’s speed too much, this tool will let you know so you can compress them to more efficient sizes.
Generally, a best practice for product photography is to never upload full resolution images to your site. Instead, resize them to the size they will be used, and compress them to 80-85% quality.
For example, if you are uploading a large banner to your homepage, resize it down to 2000px by 400px and compress the quality down from 100% to 85%.
E-Commerce Platform Specifications
If you’re not loading pictures onto your own business website, but on online marketplaces like Amazon, Etsy, or eBay, it’s best to make sure that your photos are optimized to their requirements.
Each site’s requirements are different, but they’ll be broken into:
- Technical Requirements: file size, resolution, etc.
- Image Requirements: background colors, types of shots, etc.
If you upload photos that are too high of resolution, for example, you may find that their compression of your images will make them look quite ugly.
It’s a good idea to familiarize yourself with the requirements of any site you plan to sell on before setting up a shoot. Otherwise, you might end up having to reshoot if your pictures don’t meet the requirements laid out.
Some product photography requirements and recommendations can be found below:
- Amazon: technical requirements and image requirements
- Etsy: technical and image specifications
- eBay: image guidelines and requirements
You should be able to find any online marketplace’s image requirements by logging into your seller profile, visiting the help section, or doing a web search for “[site name]” + “product photo requirements.”
Final Thoughts
As you know, the images that businesses post on their websites or social media can make or break a brand. Well-thought-out product photos are an excellent way to entice consumers to try a product for the first time; poorly-done pics have been known to drive business away.
Learning to take compelling product photos takes a little practice and dedication, but once you master it, you’ll be glad that your hard work has paid off. Follow the best practices we outlined in this article, and before long your pics will go from “meh” to “wow!”
And stunning product shots are an important part of driving online business – which is doubly rewarding when sales start rolling in.

