 Skip to main contentSkip to footer
Sunglasses product photography is a tough task, especially when it comes to reflective surfaces like sunglasses. It can be difficult to get the right angle and capture that perfect shot that isn’t ruined by glare or unwanted reflections.
But don’t let that deter you. Creating visually appealing images of eyewear is possible with certain tips, tricks, and techniques.
Get the best sunglasses photographs with these awesome tips:
- Manipulate lighting to reduce glare.
- Shoot sunglasses based on their characteristics.
- Utilize different scenes and props.
- Use a tripod to ensure consistent, stable images.
- Use the proper camera settings,
- Shoot the right angles.
- Edit your pictures for quality.

In this article, we’ll discuss the most important product photography tips for shooting sunglasses that we use in our own studio for making images stand out and look their best.
Table of Contents
1. Manipulate Lighting To Reduce Glare

When it comes to reflective products like sunglasses, the number one issue photographers face is glare. This can be caused by many things, including the lighting in your scene or even the sunglasses themselves (mirrored sunglasses are notoriously difficult to photograph).
Fortunately, with some simple changes to your lighting setup, you can avoid most of these issues. You just need to know what works and what angles cause problems so you can fix them.
For a complete write-up on dealing with reflective products, check out our post here. Otherwise, be sure you follow these tips:
- Avoid using harsh, direct lighting. This typically causes glare and unwanted reflections. Use softer lights instead such as those found in light modifiers.
- Utilize diffusion materials. Diffusion materials like Savage Translum (Amazon) help create gradients of light that are visually pleasing and don’t cause reflections or glare.
- Light the materials your sunglasses reflect. Reflective surfaces like mirrors, glass, and polished metals will only show the light source, which is why everything else is dark and black. Instead, surround your sunglasses with diffusion materials and light those.
- Use a strip box. Strip box lighting modifiers (Amazon) are the best for controlling and shaping light. They also allow you to create the most visually pleasing lighting gradients when paired with diffusion material.
2. Shoot Sunglasses Based on Their Characteristics

Not all sunglasses are the same. There are opaque lenses, mirror lenses, translucent tinted sunglasses, and metallic frames, among others. When photographing sunglasses, you must consider the frames and lenses when preparing to shoot. Different lenses require different lightning manipulation, angles, and techniques.
This section will cover a few different lenses and frames and some tips for photographing them.
Clean Your Sunglasses
There’s nothing worse than shooting the perfect picture of sunglasses only to realize there are unsightly smudges and fingerprints on the lenses. To avoid this, wear cotton gloves when setting up the sunglasses for shooting.
In addition, clean the lenses with glass cleaner and then wipe them down with a microfiber cloth to remove any tiny fibers. Doing so will reduce the time spent editing. Sometimes close-up camera shots pick up on things we don’t see right away, so it’s important not to skip this step even if you don’t see any noticeable blemishes.
Mirror Lenses
Mirror lenses are notoriously difficult to photograph. They’re highly reflective and pick up every reflection within a few inches. The best way to photograph sunglasses with mirror lenses is by surrounding them with diffusion material.
To do this:
- Place your lighting beyond 45º angle.
- Place a white foam board or Savage Translum directly in front of the sunglasses.
- Shoot just above the sunglasses and from a 45º side angle. This type of shot will capture the lenses, frames, and arms of the eyewear without creating glares or reflections.
To shoot frontal pictures of mirror lenses, utilize the white foam board or diffusion material by cutting a small hole for your camera lens.
Metallic Frames
Metallic frames cause problems because both the frames and the lenses are reflective. To prevent this, use diffusion and light reflectors to reduce shine.
I recommend the Neewer Light Reflector 5-in-1 from Amazon.com. This range of metallic shades enables you to customize your lighting and reflect light in an efficient way. In addition to light reflectors, experiment with foam boards. The color of the foam board you’ll need depends on how harsh the light is on each side.
Treat the metallic frames just like you would if it were sunglasses with mirror lenses. Place the diffusion material over the frame and use light reflectors to bounce white or silver light onto them, which will create a nice lighting gradient.
Clear Frames
Clear frames may seem challenging to shoot, but it’s relatively easy compared to mirror lenses and metallic frames. Instead of setting up your lighting around your sunglasses, you will be lighting the background instead.
- For clear frames, lower the lighting intensity so that the clear frames stand out against the background.
- Then set up your strip boxes to create a lighting gradient on your background, which can be diffusion material or colored paper.
Plastic or Matte Frames
If your sunglasses have frames that are plastic or have a matte finish, then your job is going to be much easier. Plastic or matte finished frames tend to create no reflections, so you can use any type of lighting for them.
Position your lights in a three-point lighting setup and place a white foam board or diffusion material in front of the highly reflective parts of the sunglasses. Then use your strip box angled between 20-45º for a smooth gradient.
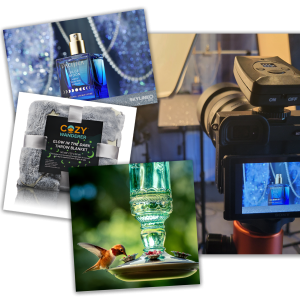
3. Utilize Different Scenes and Props

Simple photographs of sunglasses against a solid colored background are an excellent way to showcase design and details, but sometimes context matters. People, settings, and props create context for sunglasses which may help them sell.
Below are some examples of how to add context to your sunglasses photos:
- Use Models – Models showcase how the glasses look on an actual human. This is especially important if you sell different sunglasses sizes (i.e., toddlers, kids, adults, etc.). Use models in various scenes—at a party, on the beach, driving a car, hiking, and so on.
- Shoot in Different Settings – Photograph sunglasses in different settings depending on the collection. For example, shoot glasses from your summer collection on a mound of sand at the beach. For an Autumn collection, take pictures of them near a leaf pile.
- Photograph Through The Lenses – Shoot scenes through the lenses of sunglasses to showcase the tint. This is especially important for sunglasses with different lens hues. Nature scenes are excellent for this purpose.
- Utilize Accessories – Aviator sunglasses, in particular, were designed for wear with headgear. When photographing a pair of aviator shades, a military-style cap is a suitable prop. On the other hand, fashion sunglasses may be photographed next to jewelry or a pair of shoes.
Pictures of your sunglasses with context do not need to be the primary photo on your storefront, but having them available gives potential buyers the chance to see them in action.
Check out our article on lifestyle product photography for more tips and tricks.
4. Use a Tripod To Ensure Consistent, Stable Images

When taking photographs of sunglasses for a storefront, you’ll want consistent images across the board. Similar photos of your products develop brand recognition and keep the products fresh in the minds of potential consumers.
Mark the area where your tripod sits during shooting and align it exactly the same every time. Doing so allows you to accurately photograph the sunglasses and maintain consistency throughout your online store.
In addition, tripods reduce instability, allowing you to shoot at a larger aperture (we’ll discuss this more in the next section) for images with lots of bokeh (blurry background).
Another reason why a tripod is important is due to the Law of Reflections. Because you’ll want to place your lighting and diffusion beyond the angle of incidence, it’s important that your camera position does not change.
Using a tripod ensures that your camera position stays the same every time.
5. Use the Proper Camera Settings

Your camera settings play an essential role in ensuring consistent results and stunning photographs every time. This section will cover several different camera settings that you can adjust to improve your sunglasses photography.
Shooting Mode
I highly recommend shooting sunglasses in Manual mode. This mode gives you complete control over the camera’s settings.
Controlling settings is especially important when using reflectors, foam boards, and different light settings. Automatic mode doesn’t adjust based on all present factors and can even change between shots. With you in control, you ensure the best results.
For more info, check out our article on the best camera settings for product photography.
White Balance
Adjusting the white balance on your camera ensures that the camera is shooting correctly with the type (fluorescent, natural light, etc.) and level of light you’re using. A proper white balance setting creates an accurate representation of the colors you’re shooting.
White balance is particularly important when shooting on a white backdrop, as it ensures a perfectly pristine background.
Below is a table of recommended white balance settings for three different types of light:
| Tungsten Lighting | 2500-3500 K |
| Fluorescent Lighting | 4000-5000 K |
| Natural Light | 5500-6500 K |
When in doubt, it’s perfectly fine to use the automatic white balance setting. However, I recommend using one of the settings above based on your lighting or setting it with the X-Rite Color Checker for best results.
Aperture
Aperture affects how much light enters the camera lens. A higher aperture is ideal for bringing entire scenes into focus, whereas a lower aperture creates “depth of field,” which blurs the background.
When shooting sunglasses, you’ll want the sunglasses to be in focus. An aperture of F11 or greater is ideal for solid backgrounds. It captures all of the detail and creates sharp, crisp images of the eyewear.
Sometimes a lower aperture is necessary, such as when you’re shooting sunglasses with a beach scene in the background. An aperture of F6 will keep the sunglasses as the focal point and slightly blur the sand and ocean.
ISO
The higher the ISO, the brighter the photograph—but that’s not always a good thing! Higher ISOs are generally used for dark environments, but there’s a catch: the higher the ISO, the grainier the image. Pictures with a lot of grain will not showcase your sunglasses in the best light.
For highly detailed pictures of sunglasses, choose an ISO as close to 100 as your lighting will allow. To prevent motion blur and achieve those perfectly crisp images, use a tripod.
6. Shoot the Right Angles

When photographing eyewear, make sure that you’re getting the right angles. You want to capture every detail, from the clarity of the lenses to the intricate detail on the arms. The more information you provide with visuals, the more comfortable buyers will feel about purchasing your sunglasses.
The most basic shots for product photography of sunglasses include front, side, and ¾ view. These are a must-have for online storefronts. If you’re taking additional photos, utilize high and low angles, close-ups, and camera tilts that show off the lenses, frames, arms, bridge, and other intricate details.
Remember to remain consistent, and include the same shots for each pair of sunglasses you’re selling.
7. Edit Your Pictures For Quality

Once you’ve mastered lighting, camera setup, and angles, it’s time to tweak those photographs! If you’ve used the tips above, any imperfections in your shots should be at a minimum. With that said, there’s still some editing to do!
Below, we’ll cover three of the most common edits for sunglasses photography.
- Color Issues – The color should be closely matched to the actual color of the sunglasses. If there are any significant variations, you’ll need to adjust the hue, white balance, and/or curve (changes color tonality).
- White Background – When shooting on a white background, adjust the image’s saturation and clean it up using the clone/heal tool for a pure white finish.
- Glares – Overexpose the lenses. If only one lens is affected, you can copy the clear lens, mirror it, and then paste it over the glare.
- Crop – If foam board, light stands, or any other unwanted objects show up near the edges of your photo, remove them using the crop tool.
Final Thoughts
Photographing sunglasses is difficult if you jump in with a camera and just start shooting. Photographers need to learn tips, tricks, and techniques, especially when shooting reflective surfaces like eyewear.
Don’t let glares, reflections, smudges, and color discrepancies discourage you from photographing sunglasses. Once you know how to control light, hit the right angles, and edit your images, creating stunning product photography becomes second nature.
If you need professional help to shoot your sunglasses, contact us today! We are product photographers that specialize in reflective products like sunglasses, watches, sunglasses, and other items that are difficult to shoot.

