 Skip to main contentSkip to footer
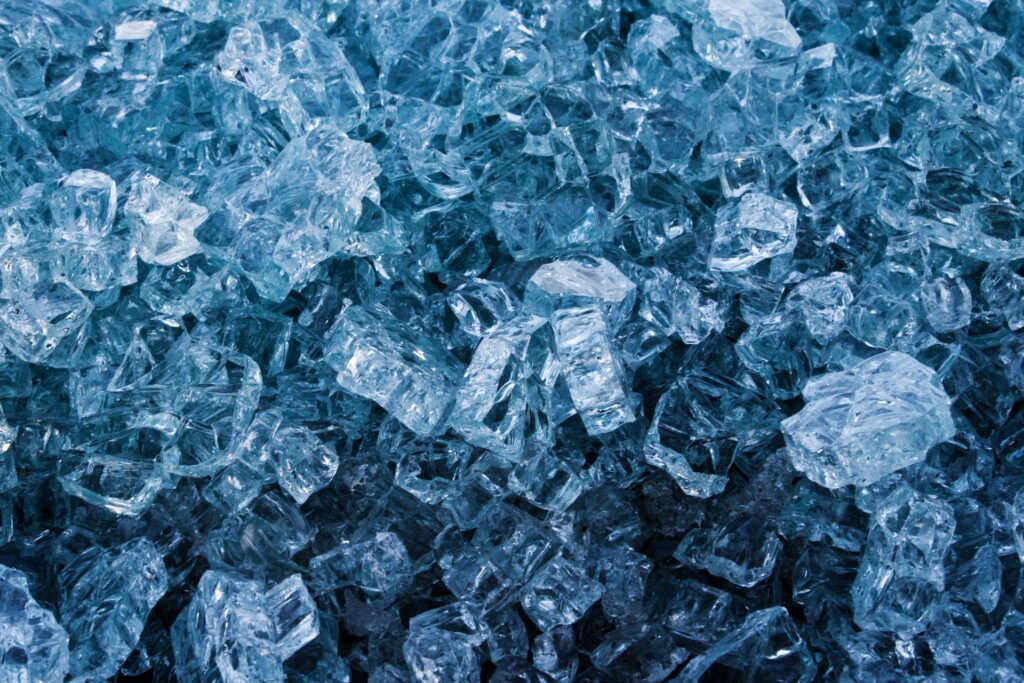
People have been using fake ice for photography since the invention of cameras. It’s a great way to add some realism to your photographs without working under the pressure of melting ice, and it can save you a lot of money in the process.
Ice cubes and shards are especially a must-have for commercial beverage photography. While genuine ice seems more natural, artificial ice is needed for high-level commercial photography where uniformity and consistency is often required. However, high quality acrylic ice can be quite expensive. But did you know you can you make your own fake ice?
Here’s how you can make your own fake ice for photography and save a fortune by using Encapso K and following these steps:
- Combine equal amounts of the Encapso K A and B liquids.
- Fill two 32 oz. (946.35 mL.) cups with Encapso K.
- Remove the plastic cups using scissors.
- Alternatively, fill silicone ice trays with the mixture of Encapso K and let set.
This article will demonstrate how to create fake ice for photography purposes. In addition, I’ll explain how you will save money using this tool.
Table of Contents
Why You Should Use Fake Ice For Photography
If you have ever tried to use ice during a photoshoot, you may have noticed how quickly it melts. Throughout the shoot, natural ice changes in size and form, which alters how the light interacts and refracts through it, affecting your photos. This is particularly bad if you want to do composite images because you’ll need continuity between photographs.
Also, real ice makes a mess, which is not a challenge for fake ice. Fake ice does not melt or shift, which ensures consistency. Therefore, you won’t need to hurry during the photo shoot.
- fake ice is reusable and can save you money
- fake ice looks like the real thing
- fake ice will not melt, which means you don’t have to worry about it anymore!
However, there are some drawbacks to using artificial ice.
Fake Ice Doesn’t Always Float in Water
In water, real ice always floats. Acrylic ice will fall, while silicone-based artificial ice will float.
Encapso K, on the other hand, is constructed of rubber. Since it has a mild buoyancy, it can substitute for genuine ice in certain liquids. However, for photoshoots, it outperforms acrylic and glass ice. It seems normal when it floats, and the random shapes and sizes you can make with it look genuine.
Another advantage of Encapso K is that you can break the substance to make remarkable ice scenes.
A cube made of acrylic or glass has a fixed form that you cannot alter, and everyone knows what the cheap acrylic ice from Amazon looks like (not good).
How Much Does Synthetic Ice Cost?
High quality acrylic or glass ice is generally sold individually, and a complete set can be quite costly.
Synthetic ice from The Set Shop, for example, typically costs between $30-$450/piece for the average beverage campaign. Encapso K, on the other hand, is a low-cost encapsulation option. You can find the standard size of Encapso K online for less than the price of other faux ice.
Plus, you can use it to make several batches of different ice cubes. Since synthetic ice needs so little upkeep, this expense is minimal in comparison. Keeping the ice’s surface clean is usually all that is required.
How To Make Fake Ice Cubes With Encapso K
Using premium acrylic ice for your photography sessions can be expensive. If you don’t want to spend a fortune but still use something that’s as effective, follow these steps to make fake ice cubes with Encapso K:
1. Combine Equal Amounts of the Encapso K A and B Liquids
Encapso K comes with two liquids that work together to create faux ice. Parts A and B must be combined in equal volumes and added to a mixing pot.
After that, blend the substances for at least five minutes. You should make a point of scraping the sides and bottom of the container many times.
When first combined, the solution will be cloudy, but it will clear after about three minutes.
2. Fill Two 32 Oz. (946.35 mL.) Cups With Encapso K
You have two choices for making fake ice:
- Fill a silicone ice mold with the mixture.
- Use the solution to encapsulate a prop.
To create big ice cubes, use a silicone ice mold and add the Encapso K solution.
However, if you choose to include accessories in your photoshoot, you should have two 32 oz. (946.35 mL.) plastic cups on hand. You may want to attach the prop you want to be encased in ice to the center of a cup, then glue the cups together with a hot glue tool.
You’ll want to wear vinyl gloves to decrease skin contact. Afterward, create a small opening in the top cup and fill them with the Encapso K blend.
Allow the Substance To Harden for 24 Hours
Encapso K needs at least one full day to completely transform into a smooth rubber solution resembling ice. For best clarity, keep the material at 73° F (22.78° C).
You should avoid curing the rubber in temperatures below 65° F (18.3° C), as the result would be cloudy and jelly-like. But, you can speed up the curing process by using a blow dryer to gently add some heat.
3. Remove the Plastic Cups Using Scissors
To cut the plastic from the hardened rubber, use your fingertips or a pair of scissors.
After that, gently crumble away pieces of the faux ice. You can keep the prop partly encapsulated for a unique photo, or you can use the ice fragments for beverage shots.
You may reuse these bits until their clarity deteriorates.
How To Make Fake Ice Cubes Without Encapso K
Believe it or not, there are other ways to create fake ice. To make fake ice cubes without Encapso K, here’s a step-by-step guide:
1. Fill Metal Ice Molds With Clear Beads
An aluminum ice tray and clear craft beads are needed to create this, or you can use a muffin tray or a different mold to create various shapes. But you must first ensure that the mold is oven-safe.
Your nearest art shop should carry bags of transparent project beads. To simplify this procedure, ensure that the beads you chose have the desired clarity for your photoshoot.
Beads are available in other colors, and, depending on the subject matter, you might want to try including colorful cubes in your photoshoot.
It is safe to fill the molds to the brim since the beads will melt and shrink during the process.
Note: It’s essential to keep in mind that burning plastic can be toxic and is extremely harmful to the lungs and respiratory system. Therefore, if you can heat your plastics outside, you should.
2. Preheat An Oven Not Used For Food to 375° F (190.6° C)
Preheat an oven to 375° F (190.6° C), which is critical when baking plastic products.
Additionally, the fake ice can shape more quickly in a preheated oven because the beads will begin melting more quickly, and the beads will form a flat, uniform structure similar to that of natural ice.
3. Heat the Beads for 20 Minutes
You must bake the clear beads for 15 to 20 minutes to melt them.
When the oven is finished, allow it to cool before thoroughly cleaning it. The objective is to leave no trace of plastic behind.
4. Allow the Mold To Cool for One Hour
Allow the synthetic cubes to cool for about an hour before removing them from the mold.
Alternatively, you can cool the pan in the freezer for many hours after baking, which makes the artificial cubes much easier to extract.
How Do You Make Fake Crushed Ice?
You can make a crushed ice effect by using water-absorbing crystals. The method is as simple as mixing the crystals with water, as the substance traps the liquid and takes on the appearance of crushed ice.
I recommend the Miracle-Gro Water Storing Crystals from Amazon.com. These crystalline chips swell and emit liquid when the temperature increases, much like actual ice.
In most cases, these results resemble snow rather than ice cubes. However, you can use this in combination with your homemade ice cubes as set decoration.
Final Thoughts
Making your own ice is a cost-effective way to expand your portfolio of innovative cocktail shots. Additionally, faux ice will assist in making restaurant and beverage advertisements more appealing, which is ideal for social media posts.

