 Skip to main contentSkip to footer
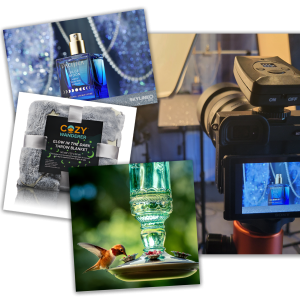
Last week we talked about the differences between using strobes vs flashes and likewise, if you’re new to the product photography world and want to level up the images you take, you’re going to want to get a good understanding of when to use strobes vs. continuous lighting.
At the very least it will save you some headaches and will save you some time, and I can tell you that in this line of work you should be prepared to use both – sometimes in the same project, and sometimes for the same image that is composited together.
So naturally the place to start is understanding which situation each type of lighting is best suited for.
When deciding whether to use strobe vs continuous lighting for product photography, you’ll need to consider your goals for your images:
- Strobe lighting is best for freezing movement and outdoor shots in sunlight
- Continuous lighting is best for emphasizing movement and shooting stills with a slower shutter speed

Because strobe lighting and continuous lighting each offer different features for photography, let’s first figure out what your goals are for your end product. Read on to find out more about how to pick the right lighting.
[table id=6 /]
Table of Contents
Strobe Lighting VS Continuous Lighting: An Example
Let’s use a mug as an example for this scenario. Say you’re taking a lifestyle shot both indoors and outdoors. What type of lighting do you use?
If the scenario is indoors and you have complete control over your ambient light, continuous lighting will work and will allow you to set up your composition and lighting exactly how you want it before taking your first shot.
But let’s take that empty mug outdoors on a sunny day. You will likely need to increase your shutter speed so much that your image is now dark or exclusively lit by the sun. You’ll want to switch over to strobe lighting so you can control the amount of light that shows up in your photo.
This is because strobes are much more powerful to light up your subject at faster shutter speeds and lower apertures, while continuous lighting needs higher apertures and slower shutter speeds to achieve the same brightness.
Take that same mug and pour in some steaming hot coffee. Now you have the addition of movement to your object from the steam rising out of the mug. You need to decide if you want the steam to appear frozen in mid-air or if you want the illusion of the steam rising, which will show up as a bit blurry in the photos.
To freeze the movement, choose strobe; to emphasize the movement, choose continuous lighting.
Strobe Lighting is Great for Freezing Action
Let’s say you’re photographing an apple being tossed in the air. Do you want it to appear as though it’s floating in the sky? Strobe lighting is perfect for this.
But if you were hoping to emphasize the movement of the apple and have it appear blurred, you would want to opt for continuous lighting instead (the sun being a continuous light source).
Or let’s say you have a beverage company as a client and they want a shot of their product with water splashing. What do you use?

In short, strobe lighting is great for taking an object in motion and making it appear frozen in time.
You can obtain a crisp, clear image without the blur from the movement. This is often why it’s recommended when photographing people, animals, or sports since they are usually not remaining completely still.
In the product photography world, we want our images to be very clear and sharp. We usually want actions to be frozen, and we want consistent lighting – so strobes are the default choice most of the time.
Why is Strobe Lighting Better for Capturing a Moving Object?
It’s all in the flash. Continuous lighting is just what it sounds like — the light is always on.
With strobe lighting, the flash is very powerful so your camera will need to take the image quickly and is synced with the flash, which captures the image at just that moment, avoiding any blurring from the motion.
Freezing the motion of a moving object requires a fast shutter speed combined with very bright light, which standard continuous lighting does not have the power to do. If you were to take a photo of a moving object with continuous lighting, the image would be blurred.
Outdoor Shots Shine with Strobe Lighting
Have you ever tried to take a photo outdoors on a beautiful sunny day but found that the sun created a lot of glare and affected the clarity of the final image?
That’s one of the pitfalls of using continuous lighting outdoors. With strobe lighting, you’ll have a lot more control over the end results regardless of any bright light that can otherwise interfere, such as the sun.
This eliminates a lot of unwanted ambient light that can cast colors on your product or change over time, resulting in inconsistent imagery. But using strobes for outdoor shots isn’t the only benefit, sometimes you can use it to blend light sources too.
More Power Equals More Control Over Other Light Sources

With strobe lighting, you are afforded a lot more power than with continuous lighting. Even if you’re outdoors or in a room with powerful sunlight, you have more options available to control the final effect of the image.
When working with strobe lighting in bright sunlight, some of your options include:
- Using manual mode—this allows you to exercise full use of the exposure settings
- Setting ISO to 100
- Setting aperture to f/8 – f/16
- Using a shutter speed of 1/200 second
Continuous lighting does not offer the power to control the settings in this way, so if your scene is outdoors and it’s very bright outside, strobes will allow you to get the image you want.
Continuous Lighting Shows Blur to Emphasize Movement
Continuous lighting is great for showing movement in a subject such as a person running or dancing, but how does that transfer to product photography? There will be some products you photograph where emphasizing movement would enhance the photo.
Some examples of products that would benefit from continuous lighting to show movement would be:
- Children’s toys – remote control vehicles, robots, spinning tops
- Home appliances – ceiling fans, oscillating fans, hand mixers
- Holiday decorations – figurines that turn their heads or wave their hands
- Outdoor equipment – bicycles, motorcycles, cars
You could still use strobe lighting to photograph these items but if you wish to show them in motion, continuous lighting would be ideal.
Still Photography is Made Easy with Continuous Lighting
Many of your subjects in product photography will most likely be still, which does affect your lighting needs.
You won’t be concerned with freezing movement or obtaining any blurring to show movement, and you will likely be in a studio where you can control all aspects of lighting.
Continuous lighting makes product photography like this easy since what you see is what you get. You don’t have this advantage with strobe lighting unless you have powerful modeling lights.
There is a lot of trial and error to get the shot just right. But with continuous lighting, you know what you’re getting and that will save you time and frustration. You’ll know before you take the shot if you need to modify anything to get the look you’re going for.
Continuous lighting tends to be the go-to for beginners to the product photography field because of its ease of use and ability to see what the image will look like before taking the shot. It takes a lot more experience to get the hang of strobe lighting settings without having to keep making adjustments.
Consider the Type of Product Photography
When choosing between strobe lighting and continuous lighting, it’s also helpful to consider the type of product photography you will be doing.
Product-Only Photography
This type of photography involves getting a clear image of the product on a white or light background. Product-only photography is often taken indoors and with little or no movement from the product.
Since it is generally an indoor, still photo, continuous lighting is great for product-only photography.
In-Context/Lifestyle Photography
This type of photography involves showing the product being used and often includes people in the photo modeling or demonstrating the product. Showing a product in use means a higher likelihood that movement will be a part of the photo and that it may be outdoors.
Strobe lighting is better for in-context photography since it can freeze the product in motion, including in outdoor settings.
Video Production
While not exactly photography work, making promo videos is very much related to product photography and a lot of the skills needed to create imagery applies. Obviously strobes cannot be used here, since you will be shooting at a much slower shutter speed.
Continuous lighting is one of your only options for video production, and RGB video lights like the Aperture MC (Amazon) provide the most versatility.
Final Thoughts
Once you’ve determined the look you want for your product photo, you’ll be better equipped to choose the appropriate lighting.
If you’re looking to freeze the subject’s movement in time or if you’ll be photographing outdoors, you’ll do better with strobe lighting. If your subject is going to be completely still or if it will have some movement that you want to emphasize, continuous lighting will be your best bet.
Here’s a handy cheat sheet chart to refer to as you go into your next shoot:
| Strobe Lighting | Continuous Lighting | |
| Better for freezing movement | ✔ | |
| Better for emphasizing movement | ✔ | |
| Better for outdoor photography | ✔ | |
| Better for still photography | ✔ |

