 Skip to main contentSkip to footer
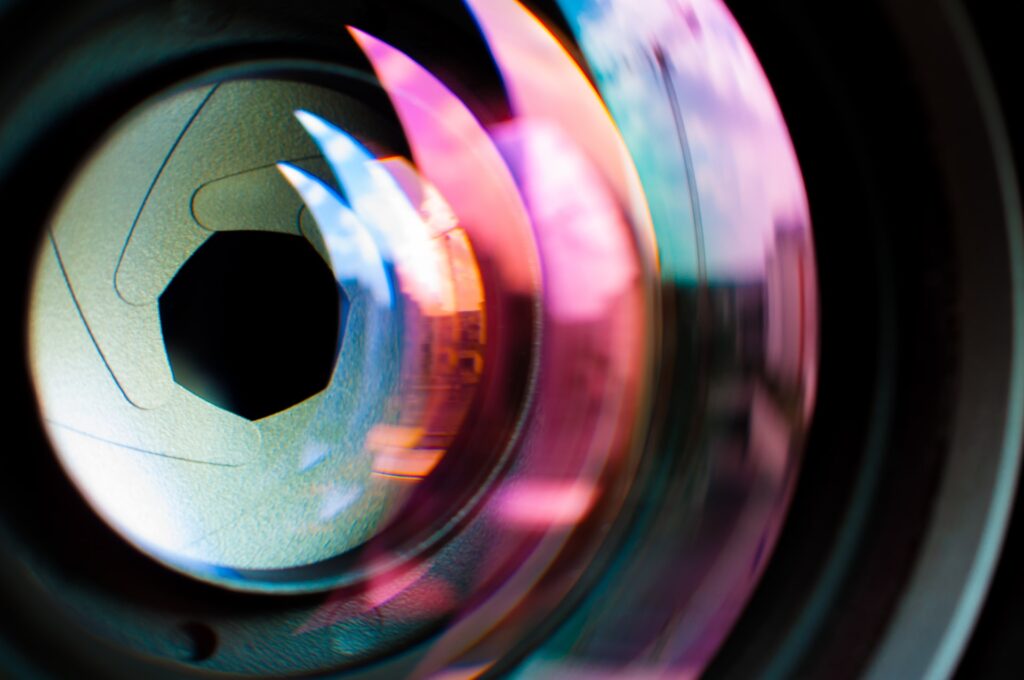
Product photography is an art that requires a keen eye and a knack for making an item look its best. It’s easy to take a product photo that looks generic and forgettable, but product photographers learn how to use certain tricks for better photos that make brands stand out.
There are many secrets product photographers use, from the angle they take them from to what kind of lighting they use. But you don’t have to be a master product photographer to take awe-inspiring photographs. Even novices can capture stellar images at a fraction of the cost, thanks to continually evolving camera and smartphone capabilities, free photography tutorials, apps, and these tips and tricks.
Here are 10 product photography hacks for better photos:
- Experiment with lighting techniques.
- Use bokeh to strategically blur your photos.
- Create your own filter effects.
- Use different backgrounds to enhance images.
- Play around with props in the foreground.
- Use everyday objects to make frames.
- Experiment with creative effects such as reflective surfaces.
- Change your environment.
- Shoot from different perspectives.
- Create your own rain gear.

These DIY product photography hacks are taken from our own experience as professional product photographers. They are meant to help new photographers get out of a creative jam while “out in the field” and to help overcome some issues you are likely to face.
Continue reading to learn some hacks that will hopefully lead you to image capture proficiency.
Table of Contents
1. Experiment with Lighting Techniques

Lighting is essential when taking good photos. It could mean using natural light to enhance the colors of a dress, or working with a light box to ensure your product is as clear as possible. Pro product photographers know how to work with a variety of lighting techniques.
Lighting may be the most important product photography hack out there, because it can make or break an image. Getting great images means playing around with different lighting techniques and finding what works best for your product photos.
Here are some easy to implement lighting techniques you can use with or without a studio:
- Try the bokeh effect: Use a tea strainer for feisty lighting effects by placing it over your light source and close to your subject.
- Create a makeshift lightbox: A box with a translucent plastic or glass side and some lamps for creating a surface where you can create gradients of light. You can also make a lightbox with just a window and a sheet of paper.
- Put the light in the background: Place a light behind your subjects to illuminate water droplets in the foreground.
- Use a flashlight to add flare effects to your images. Shine it at an angle to your lens while making the shot.
- Use Ikea’s Schottis pleated shade as a flash diffuser. Place the flash on one side and your subject on the other.
- Work with fire: Light a match in front of the lens while shooting to produce sparkly effects.
- Use Ikea’s Blanda Blank stainless steel dish as a beauty dish: This is a lighting device that uses a reflector to create dramatic light effects. The same can be achieved with a turkey pan with a hole in the center.
- Use a mirror to add an additional light source. This works by reflecting light onto product photos from the opposite direction of your main lighting source.
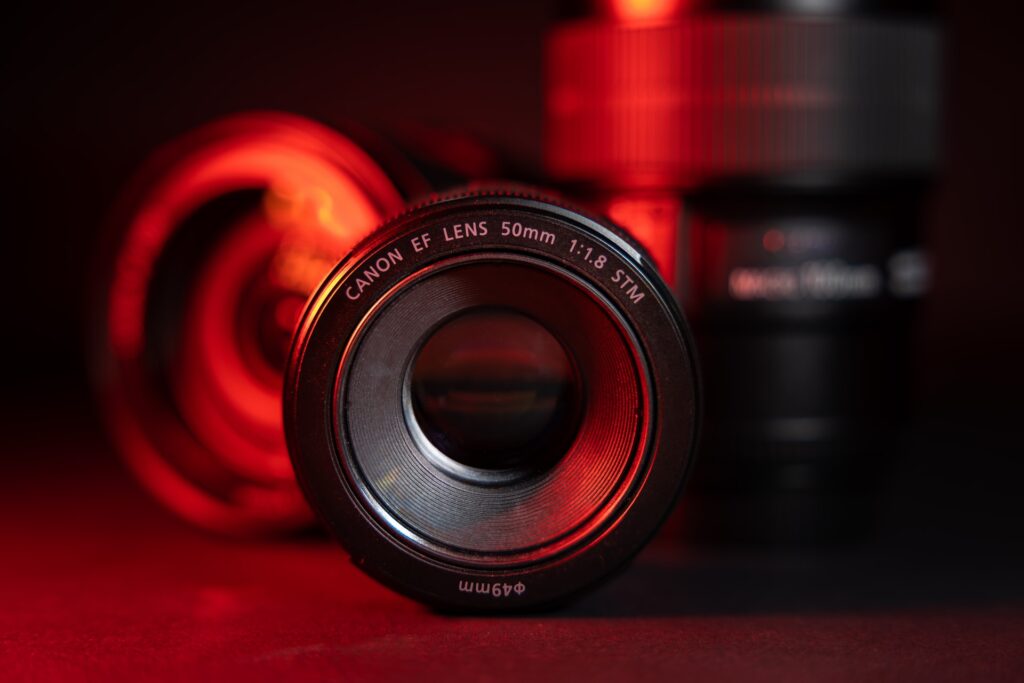
2. Use Bokeh to Strategically Blur Your Photos

Bokeh refers to out-of-focus areas in photographs taken with a shallow depth of field. It gives product photos more life and dimension. The bokeh effect also works on product images, which create a really cool vibe when done well.
This is because it will add texture and color to your photo without taking the focus off your product. Bokeh is the artistic blur produced by the out-of-focus sections of a photograph.
Use these tips to achieve an artist blur:
- Create bokeh effects by using a wide aperture on your lens, such as f/2.8-f/5.6.
- Produce a bokeh effect with pearls, beads, or aluminum foil by crumpling strips, hanging them from a line, and using them as a background.
- Create fanciful images with DIY cutout bokeh filters made out of cardboard that you wrap around the lens.
3. Create Your Own Filter Effects
We’ve all used filters on social media, but it is possible to apply filters while shooting to create unique photos. The good news is, you don’t even need specialized equipment.
Here are a few easy DIY filters to try:
- Soft-focus: Wrap tights or pantyhose over the camera lens to make a soft-focus filter.
- Filter solutions: Local craft and stationery supply stores are great resources for simple filter solutions.
- Flower petal filters: Create your own filters by shooting through thin, shimmery flower petals.
- Smear petroleum jelly on a plastic sheet for a soft lens effect: Wrap a ring of the smeared plastic around the outer portion of the lens, keeping the center clear. This hack creates dreamlike haze and blur effects typically produced by vintage cameras.
- Hazy effects: Wrap a sandwich bag around your lens (without obstructing the viewfinder) to make hazy effects.
4. Use Different Backgrounds to Enhance Images

In some situations, a plain white background doesn’t do your product justice and in order to make your product pop, it needs to be staged.
However, backgrounds can easily be distracting with product photography, so it’s important to experiment with a few options, such as:
- Instead of a lightbox, use reflective paper as an eye-catching backdrop.
- Use a laptop, tablet, or computer monitor background or wallpaper to create stunning backdrops.
- Fill a transparent umbrella with autumn leaves and place your product in the center.
- Place your product in the midst of gardens, farmland, forests, or mountain vistas, which act as natural backgrounds.
5. Place Props in the Foreground

Layering product photography is a great way to create more depth and visual interest. Just like a good background can make your products pop, adding props to the foreground can create fun and inventive images.
Here are some easy things to try with everyday objects:
- Drop leaves, magazine pages, alphabet pasta, sheet music, etc. from above your subject and scatter these around your product for a dynamic foreground.
- Shoot through a burning cylinder or any round tube to convey aggression or danger.
- Use hair strands, fishnets, thread-entwined embroidery hoops, weeds, bubbles, veils, lace, colanders, strainers, or fairy lights as foreground elements.
6. Use Everyday Objects to Make Frames

Framing your photos adds a lot of dimension and it’s surprisingly easy to do. Not only does framing your product give it a professional finish, but also makes your product pop.
For example:
- Use metallic streamers or tinsel to frame a face close-up or a product shot.
- Shoot through everyday objects, like plant pots or store windows, to create frames with a fun perspective.
- Bury picture frames in sand to create a nautical-themed portrait.
- A rolled-up book page makes a funky frame.
- A curved leaf achieves the same effect.
- Place your product in the center of tall grass to crown a breathtaking sunset.
7. Experiment with Creative Effects Such as Reflective Surfaces

Depending on the product and its intended use, adding creative effects, such as reflections, props, and photoshop is a great way to add some life to your work.
Reflective surfaces help product photography jump off the page. For example, try using polished stones or tiles as product reflectors to enhance product photos with a unique reflective surface.
Another fun idea is to place your product on top of a sheet of glass and shoot through it for an amplified look that needs minimal editing work afterwards.
Some other fun examples include:
- Shoot products on the reflective surface of a glass tabletop like Ikea’s Glasholm to induce a mirroring effect.
- Shoot through a hole in a cardboard box filled with multicolored flowers, vegetables, or fruit.
- Use a burning object to light a contrasting black-and-white background and then superimpose your product (in color) afterward with an image editor.
- Create somber images with textured items like cracked windows, woven baskets, and rocks.
- Turn yummy treats like popsicles and gummy bears into fun props and art pieces.
- Use toys like cars, planes, and park swings as props in your photos, then use image manipulation software to make them look real.
- For a semblance of movement, use props like blowing bubbles, spinning pinwheels, and rotating wet tennis balls.
- Hold a glass prism in front of the lens to create dazzling images.
8. Change Your Environment

Ideally, you can shoot your product at the perfect time with the perfect weather. But more often than not, the light soon fades and you’re left without the best photos.
Instead of relying on the weather, try making your own with these creative techniques:
- If you don’t like your current weather, make your own using water droplets from droppers or spritzes from water guns to simulate rain, for example.
- Use a swimming pool or puddle to emulate a stream, river, lake, or pond.
- Strategically place mirrors in different locations at the beach for reflective images.
- Shoot through a plastic water bottle with the ends cut off to intensify the aura of a sunset.
- For an opposite effect, cover your lens with the bottom of a glass jar to diffuse light, giving sunsets a softer glow.
- Use a chain to add high-octane lines to militant photos.
- Use vape smoke to lend an air of mystery to introspective images.
- Use a wall mirror to cast reflections on subjects.
9. Shoot from Different Perspectives

Camera angles don’t always need to be head-on, and sometimes, moving things around will work in your favor. Rather than pulling out the same tripod for the same standard images, why not try out something new, such as:
- Use height: For feisty angles, shoot from up a tree, on top of a ladder, or while hanging from a ledge. For overhead shots, attach your camera to a long pole or light boom.
- Working from above: For a similar forced perspective, tape your phone or camera to the ceiling, then trigger the shot with a remote control.
- Get low: On the flip side, shooting from a lower angle will give your product a heroic appeal.
- Work with reflections: Instead of shooting your subjects directly, capture their reflections on water or similar reflective surface.
- Use unusual props: Showcase the product being used in an unorthodox way, encased in weird containers, or staged with off-the-wall backdrops to create viewer interest.
- Work with suspension: Hanging your product diagonally, upside down, or sideways with fishing line, strings, cables, ropes, or wires that act as complementary elements in the photo.
10. Create Your Own Rain Gear

Working with water and from different angles and heights can be a lot of fun, but it can also ruin your expensive gear! The good news is that you can protect your equipment with household items.
- Use the heat guard from a coffee cup to make an instant lens hood. This also doubles as a method for “correcting” backlit subjects.
- Henriëtte Hoffs suggests making a “raincoat” to protect your camera and enable you to shoot in wet weather. Wrap a plastic bag (with the end cut off) around the camera with the lens jutting out, then secure that end with a rubber band.
- Use the transparent cylindrical case for storing multiple CDs as a rain guard for your lens. The materials in these last two hacks can double as filters for creating effects.
Final Thoughts
Product photography can be challenging because product photographers need to take into account lighting, backgrounds, and the product itself.
However, with a few simple hacks around your house or office you can create product photos that are just as stunning for less money than if you had hired an expensive photographer.
And one final tip, if you’re ever wondering about your camera gear and whether it could use an upgrade, use this camera comparison tool by CameraReviews to get an idea of what’s out there and how it stacks up to what you already have.
For more tips and tricks, check out our article on the best practices for product photography.

