 Skip to main contentSkip to footer
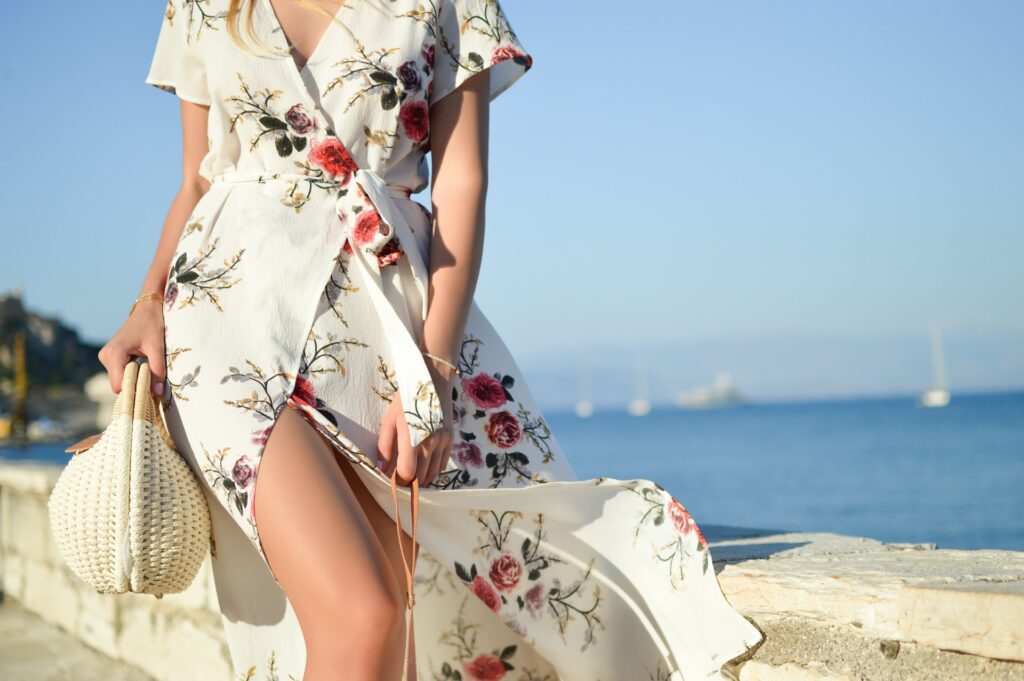
E-Commerce fashion photography is an essential part of E-Commerce marketing. E-Commerce sites need to ensure that their products are well represented in order to attract customers. There are many e-commerce fashion photography tips for e-commerce that will help you take your E-Commerce store to the next level and improve customer satisfaction.
According to Justuno, 93% of customers consider visual content as the most significant consideration in making a purchase. With that in mind, a good fashion vendor must perfect the art of photographing scenes featuring their products in order to stand out. But what if you’re not a professional photographer?
Here are 12 tips to help you master e-commerce fashion photography:
- Prepare your items the day before, so they’re wrinkle-free.
- Use artificial lighting to photograph apparel.
- Set up your lighting to capture texture.
- Get a white backdrop to prevent distractions.
- Take 5-8 shots of each item.
- Capture all of a product’s style possibilities.
- Align the brand’s values and target audience.
- Reduce the camera’s ISO to less than 640.
- Increase the aperture above f/11.
- Activate the white balance.
- Set the correct color space profile.
- Take inspiration from brands you love.
- Use lifestyle photography.

Ready to take your e-commerce fashion photography to the next level? Follow these tips and watch your conversion rates soar!
Table of Contents
1. Prepare Your Items the Day Before, So They’re Wrinkle-Free
You should attempt to catch the garments in as near-perfect a condition as possible. Clothing may become wrinkled and worn from storage, so be sure to prep your items the night before.
Additionally, you can use image manipulation software such as Photoshop to make final adjustments and color corrections.
However, bear in mind that relying on Photoshop to beautify overly creased clothes is not a good idea because it can be very time consuming. Excessive editing can also jeopardize the image’s quality. As such, it is recommended that you get your garments ironed, washed, and lint-free before a photoshoot.
One tool we like to use is a garment steamer, which can be used to easily remove wrinkles.
2. Use Artificial Lighting To Photograph Apparel
There are two types of lighting available for product photography: studio lighting and natural/continuous lighting. Your choice depends on the style you’re photographing and your experience with using your equipment.
Natural lighting isn’t ideal for clothing because the light can change from picture to picture, which affects the colors and white balance of your clothing. Additionally, natural lighting will dictate the time of day you’re able to shoot as well.
Artificial lighting such as strobes gives you the most control over the lighting conditions. You can control the subject matter, shooting angle and other details that may not be possible with natural lighting. Plus your images will be consistent from image to image
3. Set Up Your Lighting To Capture Texture

Texture is an important quality of any product photography, especially when it comes to clothing and apparel. However, lighting it from the front can cause problems because light that comes from the same direction as the camera will eliminate all micro-shadows.
To eliminate this and enhance the textures of your clothing, set your lights to come from a perpendicular angle from the camera. By doing this, you will capture all of the subtle details present in the materials you shoot.
4. Get a White Backdrop To Prevent Distractions
By keeping the backdrop plain, you will guarantee that the material you’re selling does not get lost in the picture.
Choosing a white backdrop is also advantageous if you want to use these images with Amazon product lists. And although a white background is not necessary for Google Shopping, it is a highly recommended best practice.
You should consider purchasing a roll of Savage Translum (Amazon) if you’re trying to shoot different items in a single session or need a white background.
Savage Translum is a massive roll of white diffusion material that is “white balanced” for photography that you can wash and reuse if it becomes dirty during the shoot.
A giant poster board or a roll of photography paper is an alternative if you have trouble finding them available.
5. Take 5-8 Shots of Each Item
When capturing your pieces, you want to ensure that you display all significant aspects of the item for sale. However, the pictures should not be repeated or spammy.
Five to eight photographs from various perspectives are sufficient to convey all information without distracting the client.
There are three distinct styles of e-commerce clothing product photography: flat lay, ghost mannequin, and hanging apparel. I’ll describe how they function best below:
- The flat lay photographic technique involves arranging the objects on the floor and photographing them from above at a 90° angle. Male clothes, shoes, and simple wardrobe pieces are often photographed in the flat-lay style.
- Ghost mannequin items are taken from eye level. The resultant clothing images provide an understanding of how it appears on a person. Ghost mannequin photography is preferable with apparel that fits more snugly.
- Hanging apparel often necessitates taking pictures at eye level. The garments are photographed on hangers, allowing gravity to function as a stylist. This style of photography is ideal for garments made of flowing fabrics such as silk.
6. Capture All of a Product’s Style Possibilities
Along with displaying a product from every perspective, E-Commerce photos should depict any conceivable variation of a piece.
If you’re selling a headband that doubles as a belt, for example, you’ll want to provide photos of each style. If you’re offering a pair of pants in four different shades, you must demonstrate each to inform your customers.
Suppose you’re selling clothing that has many variations. In that case, 360 degree product photography can make more sense. It enables you to create interactive product images that customers can see from all angles.
7. Align the Brand’s Values and Target Audience
Each piece of your content should represent your brand. This includes photography and copywriting for your social media accounts.
If you’re an older company, reshoot any out-of-place material to ensure your brand maintains a high-quality feel. Since fashion is not timeless, each new advertisement must represent the brand’s changing aesthetic.
Also, consistency among the pictures aids audiences in comparing models. Online customers spend longer on your page if browsing imagery is made simpler.
Most critically, consider the types of photographs to which your viewers react. Remember their identities and desires, then use these elements in your pictures.
8. Reduce the Camera’s ISO to Less Than 640

Your camera’s ISO setting should be under 600–640. Increased ISOs create noise grain, which is colored speckles that give images the appearance of being old films.
A tripod is also a valuable tool for maintaining a clear image. By using a tripod, you will be able to keep an ISO of 100 or 200 and use a longer shutter speed for optimum visibility and sharpness.
However, if you’re shooting clothing on a model or your subject is moving then a faster shutter speed will be necessary.
9. Reduce the Aperture Above F/11
Aperture determines the depth of field for your camera, and the number beside an f symbol denotes this function, and we’ve written a dedicated article on this subject that goes more in-depth here.
Generally, a higher aperture means more of the picture would be in focus. You’ll find these settings in your camera can be changed manually.
Shopify, the second-best e-commerce platform, suggests using a larger aperture than f/11. This will emphasize all details of the item. When shooting close-up shots of smaller items, try somewhere between f/8 and f/16. This would also be great for smaller products like jewelry.
10. Activate the White Balance
Your camera’s white balance setting determines how it interprets the colors it captures.
Different light sources provide varying degrees of color temperature, resulting in a color cast that makes it impossible for your camera to evaluate true white, and making it a nightmare to fix issues in post production.
There are several kinds of light sources, but the most prevalent are as follows:
- LED
- Sunlight
- Tungsten
- Fluorescent
You should adjust the white balance to match the kind of light source you’re using. Otherwise, if you set this to Auto then your colors can change from image to image and will require more post production.
11. Set the Correct Color Space Profile
Color space refers to the spectrum of colors that can be shown in a particular picture. Without the proper color space, your clothing or jewelry colors can appear differently on various display screens or browsers.
SRGB is the optimal color space profile for maintaining clear and vivid images across many screens, browsers, and websites.
You may opt to set your camera to SRGB, removing the need to convert the file after editing.
However, SRGB captures a more limited variety of colors than the default mode of your camera. Because of this, it would be best to convert the picture after processing.
For the most accurate colors, it’s best to use the X-Rite Color Passport to create unique profiles for each lighting condition.
12. Take Inspiration From Brands You Love
You likely already have several labels whose ads you respect. It would help to look at their product imagery and consider how a particular method might work with your own photos.
And suppose you need role models in the photography world. In that case, it will be beneficial to consult trend websites such as Pinterest and Behance for not only inspiration, but also to keep up with the latest trends.
13. Use Lifestyle Photography for Social Media

Lifestyle product photography places garments in situations where customers would use them. If you offer hiking boots, lifestyle images on your E-Commerce store can feature someone wearing them on a hike or walk. If you offer bathing suits, add some photos of people wearing the items at the beach.
These kinds of pictures work very well on social media and help to draw customers in. Seeing the items on a real person (even if that person is a model) will help them better understand its size and how it might fit.
This style of photography will help improve the following aspects of your E-Commerce products:
- Sizes are evident. The scale of your items is best expressed when compared to nearby objects.
- Realistic pictures help to tell a story about the product. Lifestyle photography will demonstrate to consumers that you market products that promote a better lifestyle.
- Nice scenes elicit much more emotional responses than items on a white background. Since humans make the majority of their choices emotionally, it is essential to stimulate the portion of the brain that regulates feelings while attempting to sell.
Final Thoughts
Fashion photography is an important part of E-Commerce and building your brand. It’s more than just taking pictures, it’s about how you can create a better customer experience and tell your brand’s story in the process.

